 University of North Texas

Remote Access
Disclaimer: Multi-factor Authentication (mfa.untsystem.edu) needs to be set up and installed on your phone before you can access the virtual labs.
Access CoB Applications (via Horizon)
Remote access to G. Brint Ryan College of Business applications is provided by our Horizon virtual desktop system. You can connect to different "pools" of virtual machines, based on your needs and entitlements, from any internet-connected computer. By default, all CoB faculty and staff are entitled to connect to the Faculty-Staff VM Pool and the current Lab Pool (see screenshots below).
VPN
You must connect to the UNT VPN before connecting to Horizon.
- Navigate to untvpn.unt.edu
- Log in with your EUID and password.
- Select GlobalProtect agent at the upper right.
- When you run GlobalProtect, enter untvpn.unt.edu and click connect.
- Fill in the EUID and Password in the same way as the first step.
- Approve the DUO push notification that is sent to your Smartphone.
- Click accept after reading the EULA.
- You're now connected.
- When finished open GlobalProtect from the system tray on the bottom right of your computer screen and choose disconnect.
Installation Instructions
Navigate to RCoB-horizon.unt.edu to download and install the latest version of the Horizon client appropriate to your system.
- Log on as an administrator before installing.
- Run the downloaded .exe file to start the installation.
- Follow the installation wizard to complete the installation.
- When prompted to enter a connection server, enter RCoB-horizon.unt.edu.
- Double-click the Horizon Client on your Desktop to run the client.
- Open the downloaded disk image.
- Follow the installation instructions, and when prompted, drag the Horizon icon into your Applications folder.
- Eject the disk image from Finder.
- Double-click the Horizon Client in your Applications folder to run the client.
Note- Mac users may have to disable verification for server identity certificates. To do this follow these instructions.
If while using a Mac you encounter an error regarding the server certificate and are unable to access Horizon, you will need to do the following.
Navigate to the Horizon Client menu in the upper left hand of the screen, and click
on "VMware Horizon Client" and then click “preferences”.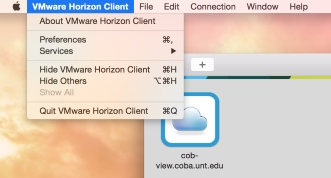
Navigate to the “Security” tab and select the check button that says “Do not verify
server identity certificates”. Hit apply and then retry your connection.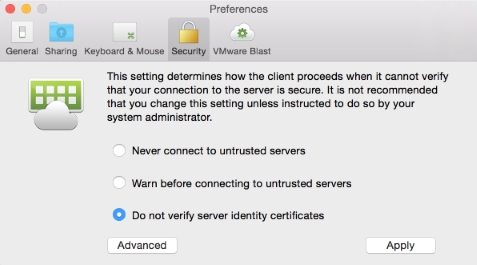
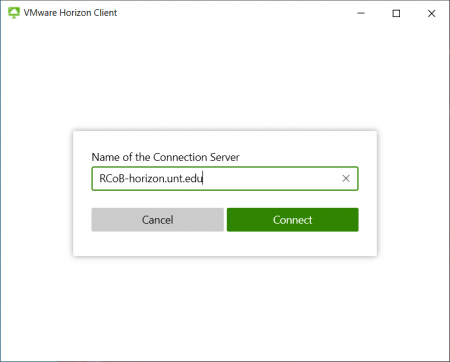
In the VMware Horizon Client application, set the Connection server to RCoB-horizon.unt.edu
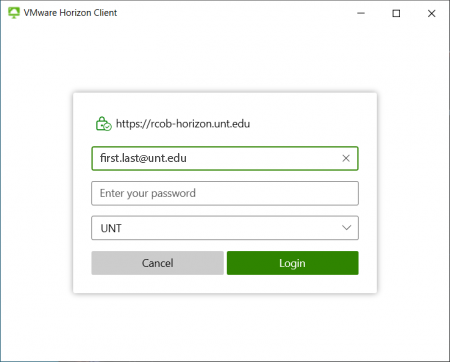
Log in using your email, making sure you change the Domain to UNT for faculty/staff.
Note: that students use the STUDENTS domain and student email (firstlast@my.unt.edu)
if you are instructing your students how to log in.
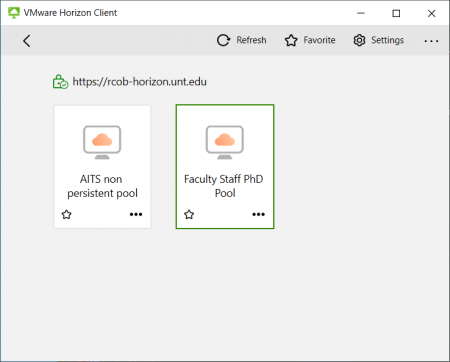
You should then see a selection dialog similar to the following:
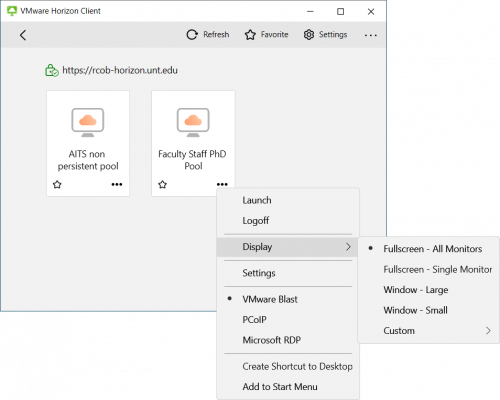
You can set the display settings by right-clicking on the pool. If you have a multiple-display setup, you can set the VM to fill one or both screens, or show a smaller windowed view. We suggest you change the display to Window if you plan to switch between Horizon and your home/local machine a lot.
Select the appropriate pool for your current needs (you may only see one or two pools, depending on your entitlement). Double-click the icon and the Horizon Client will then open in a new window to the virtual machine.
When finished with your session on the Faculty/Staff pool, it is best to log off of the virtual windows machine rather than close the Horizon Client window. When working on a different pool, however, closing the window is just fine.
Disclaimer
Although the Faculty/Staff pool machines are non-persistent, it is best not to rely
on them as your only storage source when working on Horizon. Make sure you save the
files you want to keep to the H: drive or USB drive. The Student Lab, Classroom, and
Graphics pools are not persistent; when using these pools, the virtual machine will
be wiped when you log off.
Connecting a USB storage device to Horizon
- Make sure your USB device is plugged in.
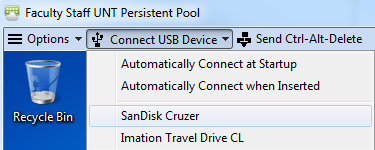
- Click on Connect USB Device at the top of the Horizon window.
- Select your USB device from the list.
Access your email
From your home/laptop computer:
To setup Microsoft Outlook on your personal computer please follow the instuctions
on the CAS IT Services website.
From the web:
To access your Exchange email account from any web browser visit https://outlook.office.com/mail/ and you can connect to your email from anywhere in the world. Use you @unt email
to login and password.
Access Your physical work computer (via RDP)
Note: If you are off campus, then you must connect to the VPN by following the instructions above before you can connect to your computer through RDP.
To use RDP:
Click on the start menu in the bottom left of your computer screen.
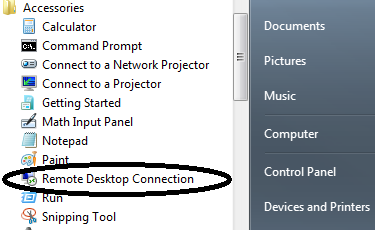
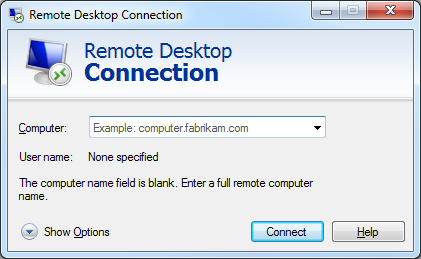
Click on Start -> All programs -> Accessories -> Remote Desktop Connection
In the box that pops up please enter your computer's name (FQDN) or IP address.
Example: blb100a.unt.ad.unt.edu
To obtain this information:
- Click on Start -> All programs -> Accessories -> Command prompt
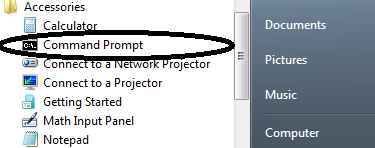
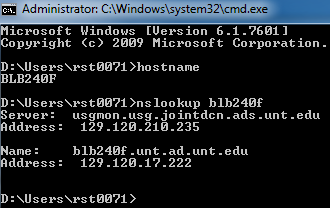
When the command prompt opens type in hostname and then enter to get find hostname. Then type in nslookup <hostname> and then enter, where <hostname> is the output from the first command. In the output "Name" is your FQDN, and "Address" is your IP.
Paste your FQDN in the empty Computer Box as shown in the image below.
Enter your credentials under “use other credentials” using unt\EUID and your UNT password.
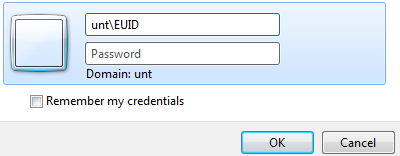
Click OK and it will connect you to your desktop on your computer on campus.